Dyeing Wood Buttons
You can use fabric dye to add character and colour to more than just fabric. Tintex will dye unfinished wood without chipping or peeling. Try this simple DIY to update buttons, beads or other small wood items anytime. Generally softwoods may absorb more colour and hardwoods may use more dye. Keeping item in dye bath longer can produce brighter or more intense colours. Less dye will make pastel or lighter colours.
Materials Needed:
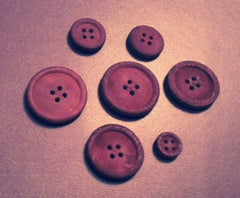
- Wood buttons or other small wood item (clothespins, beads etc.)
- Tintex Fabric Dye(s) of choice
- Measuring cup
- Measuring spoons (Tsp & Tbsp)
- Dyeing container (plastic bowl, stainless bowl or glass bowl)
- Plastic cover for workspace
- Rubber or plastic gloves
- Paper towels to test colour
- Fine sandpaper (optional to remove finish)
- Sewing supplies (needle, thread, scissors) or glue gun (optional to attach dyed buttons to garment, accessories or crafts)
Directions:
- Protect work area with newspaper and plastic; protect hands with rubber or plastic gloves to avoid staining.
- Prepare wood by sanding to remove existing finish, wipe with damp paper towel to remove dust.
- Prepare dye powder: measure 2 tsp Tintex with 1 cup very hot water (140 F is preferred, so use a microwave or a tea kettle if needed). You can also make your own custom colour using 1-3 dyes of your choice.
- Test dye color to be sure that you are satisfied (use a small piece of fabric or a light coloured paper towel)
- Use a plastic container, glass or stainless bowl; all items need to be fully covered with dye solution.
- Dye for up to five minutes (or until color is ideal) item will appear slightly darker while wet.
- Rinse items to thoroughly with cool water to remove extra dye, use soap and water to hand wash and air dry as usual.
- Attach buttons to garment or use in crafts or accessories


